With spring showers comes water, and lots of it. Don't let it through your windows.
Water damage is one of the most significant issues that homeowners can face. When it comes to replacement windows, the risks of water damage and occupant health risk can be compounded if the installation is not done correctly. In this month’s article, we’ll explore the terrifying reality of failed replacement window installation, and the devastating effects it might have on a home.
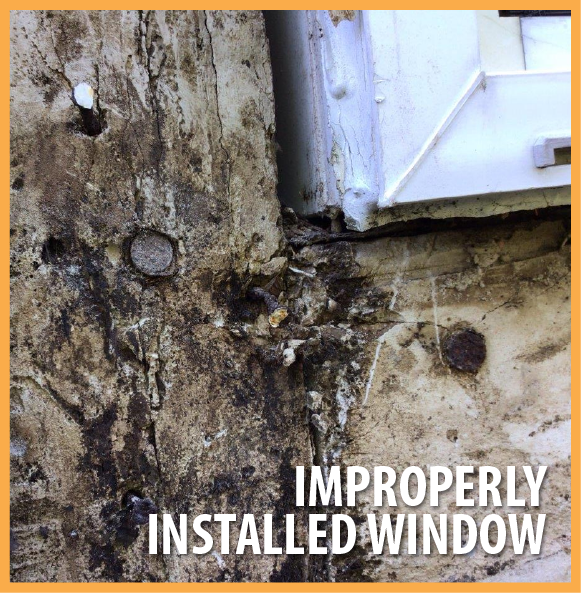
The installation of replacement windows requires precision and attention to detail. Unfortunately, not all contractors have the experience or knowledge necessary to do the job correctly. When windows are not installed correctly, water can seep into the walls, floors, and other parts of the home, causing extensive damage. The worst part is that water damage can often go undetected for months or even years, leading to the growth of mold and mildew, which can pose a serious health risk.
The horror of failed replacement window installation is not just limited to water damage. Poor installation can also lead to drafts and air leaks, which can cause significant energy loss and increase your heating and cooling costs. Additionally, windows that are not properly installed can be a safety hazard, as they can easily become dislodged and fall out of the frame.
If you suspect that your replacement windows may have been installed incorrectly, it is crucial to take action immediately. Look for signs of water damage, such as mold, mildew, or peeling paint. You can also check for air leaks by holding a candle or lighter up to the window frame to see if the flame flickers. If you notice any of these signs, it’s essential to call a professional contractor to assess the damage and make the necessary repairs.
In conclusion, failed replacement window installation can be a terrifying and costly experience for homeowners. The risks of water damage, air leaks, and safety hazards are significant and can have lasting effects on the home and its occupants. If you are considering replacement windows, it is crucial to choose a reputable contractor with experience and knowledge in window installation. Do not take any chances with your property – protect it from the horror of failed replacement windows!
General Installation Guidelines
Proper installation of replacement windows is crucial to ensure that they function properly and do not cause building envelope problems. Here are some general steps for installing replacement windows:
- Measure the opening: Measure the width, height, and depth of the existing window opening to ensure that the replacement window will fit properly. The replacement window should be slightly smaller than the opening to allow for shimming and insulation.
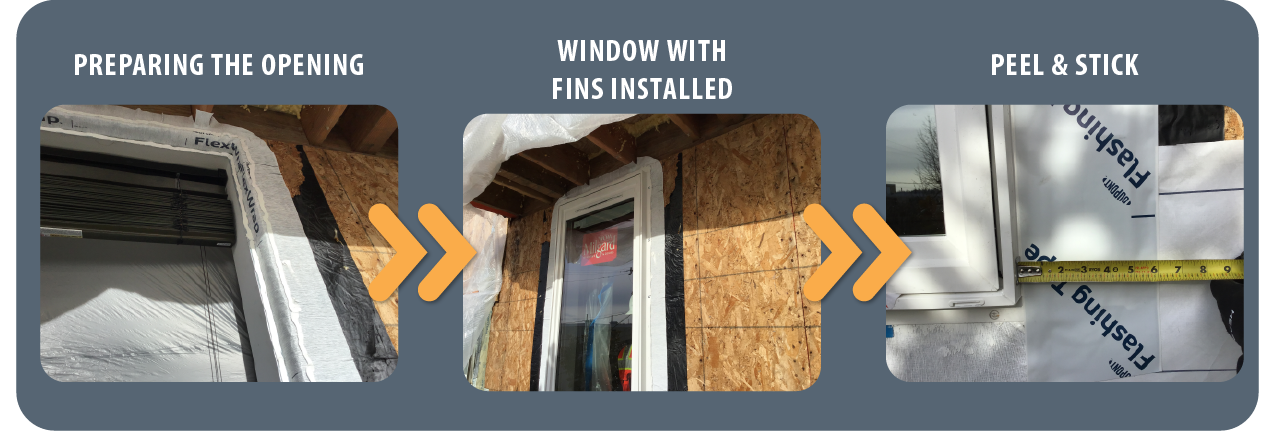
- Prepare the opening: Remove the old window and clean the opening, making sure to remove any debris or old caulking.
- Install the sill pan: Install a sill pan at the bottom of the opening to prevent water from entering the building. The sill pan should be sloped toward the exterior and be installed with a continuous bead of sealant.
- Install the window: Set the replacement window into the opening and secure it with screws or nails through the window flange. Shim the window to ensure that it is level and plumb, and fill any gaps around the window with foam insulation or backer rod and sealant.
- Insulate the gaps: Once the window is installed and sealed, insulate any remaining gaps around the window frame with spray foam insulation or backer rod and sealant.
- Install the trim: Install interior and exterior trim around the window to provide a finished look and to seal any remaining gaps.
It's important to note that these are general steps, and proper installation may vary depending on the specific type and brand of replacement window. It's recommended to follow the manufacturer's installation instructions and consult with a professional if necessary.